If you’ve ever held a beautiful pendant in one hand and a chain in the other and thought, “How do I join you two together without it looking weird?” — congratulations, you’ve just met the magical world of bead bails.
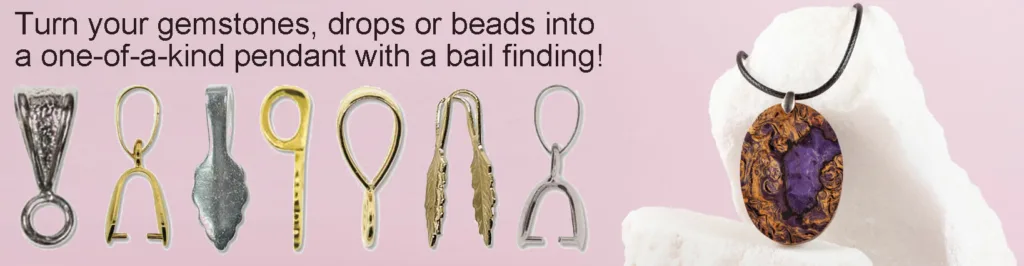
Bead bails are the unsung heroes of jewellery making. They’re the tiny but mighty components that connect your pendant, gemstone, donut, or scarf to a chain, cord, or ribbon. Without them, your masterpiece is just… a very pretty paperweight.
Let’s break down the different types of bead bails, what they’re used for, and how to choose the right one for your next jewellery project.
What Are Bead Bails?
A beading bail is a jewellery finding that attaches a pendant or focal bead to a chain or necklace. Some bails glue on, some pinch on, some fold, and some open like a jump ring with ambition.
They’re essential for:
- Pendant necklaces
- Gemstone donut pendants
- Scarf jewellery
- Crystal drops
- Resin creations
- Polymer clay designs
Now let’s get into the fun stuff.
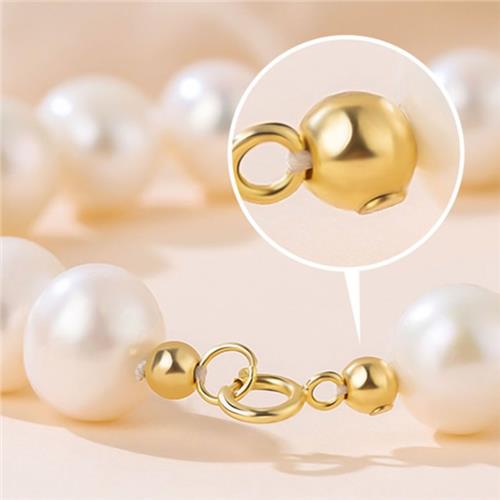
Bead Bails
The classic. The reliable. The “I just need something that works beautifully” option.
Standard bead bails are basically a metal bead, sometimes plain, sometimes decorative, that have a loop for hanging a drop, tassel or charm. You’ll normally need a jump ring to connect your charm to the loop on the bead bail. Once you’ve attached the charm to the bail, you can then quickly and easily work the assembly into your stretch bracelets, anklets or necklace designs.
Perfect for:
- Crystal pendants
- Resin drops
- Polymer clay charms
- Metal charms
They’re neat, elegant, and come in a huge range of finishes.
Bow Tie Bails
Yes, they really do look like tiny bow ties. And yes, they are adorable.
Bow tie bails feature two decorative flared ends and a centre loop. They create a lovely finished look at the top of a pendant and add a touch of extra detail.
Best for:
- Glass crystal pendants
- Handmade resin pieces
- Decorative focal beads
If you want your pendant to look polished and professional, these are a brilliant option.
Donut Bails
Got a gemstone donut with a big hole in the centre? Enter the donut bail.
These clever little findings slide through the centre of the stone and create a loop at the top for your chain. No glue required. No wire wrapping needed.
Perfect for:
- Gemstone donut pendants
- Large-hole stone pieces
- Crystal rings
They make wearing those chunky gemstone donuts effortless.
Glue-On Bails
Sometimes your pendant has no hole at all. That’s when glue-on bails save the day.
These flat-backed bails attach directly to the back of your pendant using adhesive.
They’re ideal for:
- Cabochons
- Flat resin pieces
- Polymer clay designs
- Glass tiles
- Gemstones
For most glue-on bail jobs, we recommend E6000 adhesive. It’s strong, flexible, and designed for jewellery making. Apply a small amount, press firmly, and allow proper curing time for best results.
Leaf Bails
Leaf bails are like glue-on bails… but smarter.
They feature two decorative arms that fold over the top of a pendant, meaning you glue both sides for extra hold. That dual contact makes them more secure than single-surface glue-on bails.
Great for:
- Flat gemstone pendants
- Resin slabs
- Polymer clay pieces
- Handmade focal charms
They’re decorative and practical. We love a multitasker.
Pinch Bails
Pinch bails do exactly what the name suggests. They pinch.
These bails have two prongs that insert into a top-drilled pendant (like many crystal drops) and close together to hold it securely.
Ideal for:
- Top-drilled crystal teardrops
- Glass pendants
- Stone drops
No glue required. Just gently close with pliers and you’re good to go.
Scarf Bails
Scarf bails are larger, chunkier bails designed to slide over fabric.
They’re perfect for:
- Turning a silk scarf into a necklace
- Adding a decorative centrepiece to fabric
- Statement jewellery designs
They have a wide opening that allows scarves, cords, or thick ribbons to pass through easily.
If you want jewellery versatility, scarf bails are fantastic.
Triangle Bails
Triangle bails are a bit of a hidden gem in the jewellery findings world.
They’re shaped like a triangle of wire with an opening along one side. You can gently open them, slide in a pendant loop or bead, and close them again.
They’re:
- Discreet
- Minimal
- Easy to use
Perfect when you want a simple, modern look without bulky hardware.
Choosing the Right Bead Bail
When selecting a bead bail for jewellery making, consider:
- Does your pendant have a hole?
- Is it top-drilled or centre-drilled?
- Is it flat-backed?
- Do you want decorative or minimal?
- Will it be worn on chain, cord, or scarf?
There’s no single “best” bail. It all depends on your project.
Why Bead Bails Matter
The right bail can:
- Improve the way a pendant hangs
- Make your jewellery look professionally finished
- Add decorative detail
- Increase durability
- Make swapping pendants easy
They may be small, but bead bails completely change the final look of your design.
Whether you’re working with crystal pendants, gemstone donuts, resin art, or polymer clay creations, having a good understanding of bead bails and jewellery findings will make your projects easier and more polished.
Now go forth and bail brilliantly.