Posted on

How To Identify Czech Glass Beads

Czech glass beads are an incredibly popular choice for anyone who makes their own jewellery, decorative pieces and other beaded creations. Whether you’re producing your masterpieces just for family and friends or you create beaded jewellery as part of a small business, Czech glass beads remain a mainstay because of their high-quality production methods and beautiful lustre. 

In order to make sure you’re investing in the best quality beads, it’s important to know the difference between Czech glass and other pale imitations. So, how can you tell if your Czech beads are original? Read on as we get to the bottom of the issue. 

How to identify Czech glass beads

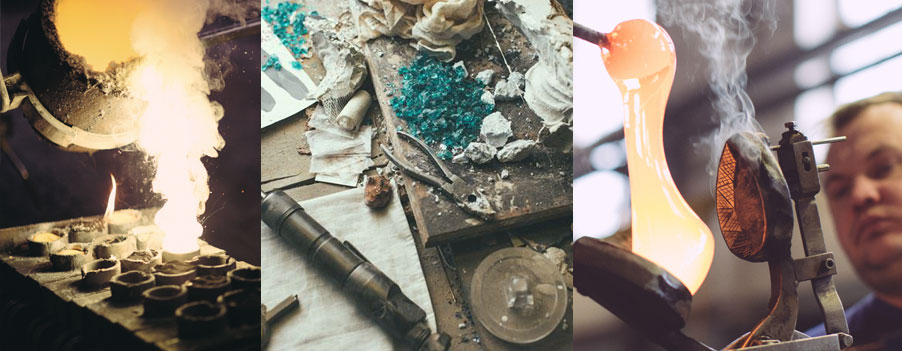
The easiest way to identify Czech fire-polished glass beads is to check for the tell-tale signs of their manufacture. Czech fire-polished beads are first cut by a machine into a faceted shape. Then, they’re heated to soften those facet cuts and create an illuminating surface. Fire-polished beads will have a faceted profile that has softly rounded cuts and be very shiny on the outside. However, they won’t have the crystal clear clarity of crystal glass beads, which are rendered more clear thanks to the inclusion of lead. 

The most popular types of Czech glass beads

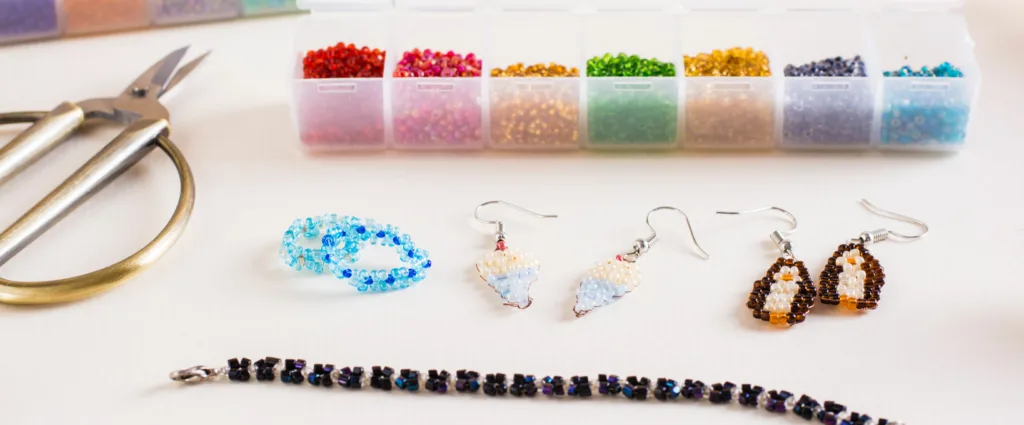
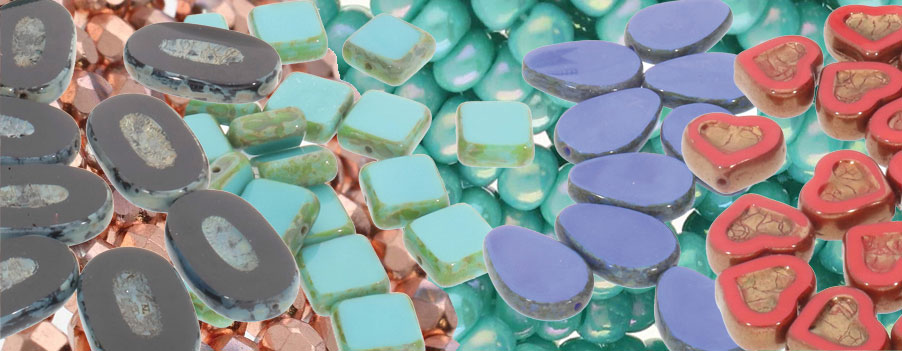
There are hundreds of thousands of different types of Czech glass beads — yes, you read that right! As a cottage industry, many small and large manufacturers create individual designs and shapes specific to their artisanal tradition or area of the Czech Republic. If you are looking for genuine Czech glass beads, there are a few styles that are classically created within the Czech Republic:

  • Brick — The name gives this style of bead away. A slim rectangular bead with two holes down its length — brick beads add a lovely fullness to any beading project without adding weight. 
  • Arcos par Puca A crescent-shaped bead with three holes ideal for multi-threading projects.
  • Druks Druk beads are small, smooth, round beads made using the pressed glass method. They can be used to great effect to create large-scale pieces like clutches or adorning clothing for extra texture.
  • Briolette Briolette beads use many intricate facets to create a high-shine finish that mimics the look of semi-precious gemstones and is often cut into a teardrop shape.
  • Candy — These round and shiny Czech glass beads are excellent for a variety of applications and come in a stunning array of colours and finishes for almost any project. 
  • Cali These ovoid-shaped beads feature three holes and are great as spacers or in more complicated beading patterns that form a larger picture. 

How to tell if a Czech bead is original 

Unfortunately, the cottage industry model of Czech glass bead making is both what makes it so diverse and so challenging to track the provenance of a bead. The only way to ensure that you have genuine Czech glass beads is to either consult a Czech glass antique specialist or purchase your Czech glass beads from a reputable retailer like Beads N Crystals. 

Where to buy genuine Czech glass beads

Fortunately, at Beads N Crystals, you don’t have to figure out how to tell if a Czech bead is original — we’ll do that for you! Our collection of Czech glass beads is sourced from authentic suppliers and is guaranteed to have all the lustre, unique handmade touch and superior quality of the genuine article. 
If you’re unsure which Czech glass beads will be best for your beading project, you need help matching supplies for a project or just some inspiration, talk to us! Our friendly team will be happy to help you with anything you need.

Posted on

How Are Czech Glass Beads Made

You may have heard of the term before, but what exactly are Czech beads? What’s unique about the making of Czech beads and why did they end up with their name? If you’ve been confused about the term or seen beads described as ‘Czech glass beads’, wonder no longer! 

In this article, we’ll explain how Czech glass beads are made, how the process has evolved over time and what sets these beads apart from the rest. 

Preciosa’s world-leading manufacturing facility in Czechia.

Why ‘Czech beads’?

The process of making Czech beads is an ancient, handmade process that relies on the expertise of well-trained artisans. They take their name from the modern Czech Republic, but these beads and their unique craftsmanship pre-dates the Czech Republic, Czechoslovakia and even the modern nation-state. 

In the region known as Bohemia, craftspeople took advantage of the natural deposits of sand, quartz and abundant flowing water to master the art of glass blowing and, in particular, glass beads. Drawing on traditional techniques from the Egyptians and other ancient civilisations, these Czech and bohemian artisans began experimenting with different methods, producing what soon became beads of such extraordinary quality that the name ‘Czech beads’ became synonymous with fine craftsmanship around the world.

How are Czech glass beads made

Because Czech beads have been made for centuries by small family businesses and artisans, the exact methods for making Czech beads are a closely guarded secret. However, the basic process is that large rods of molten coloured glass are pressed into moulds of different shapes and sizes with a needle in between to form a hole. Beads made in this way are called Czech-pressed glass beads. Fire-polished beads are another type of Czech bead, which are roughly cut into faceted shapes and then heated in large ovens, which softens the cut edges, adding lustre and shine in the process. 

Expert craftspeople work tirelessly to produce some of the finest glass products on the planet.

What are Czech beads made of? 

All Czech beads are made from coloured glass produced in the Czech Republic. They’re made from responsibly sourced local Bohemian sand. It’s a lead-free glass and crystal alternative that comes in various colours and can be processed using the fire polishing method to create an even more lustrous and high-shine surface. 

Responsibly sourced Bohemian Sand is the source of silica required to make Czech glass beads.

What’s the difference between Czech beads and Swarovski beads? 

Unlike Czech glass beads, Swarovski beads are made using crystal glass which contains lead and is slightly harder than their glass counterparts. Only beads manufactured by the Austrian company Swarovski can be called by that name. Swarovski crystal beads are often defined by their very precise faceted surface, while Czech glass beads tend to have more rounded shapes. Allowing more room to experiment and create different finishes, they can also be coated with matte finishes, patterns and metallic effects.

Are Czech glass beads only from the Czech Republic?

Yes — Czech beads come from large and small manufacturers in the Czech Republic, now referred to as Czechia. Czech glass beads are still made using traditional and time-honoured techniques, which gives them their reputation for being high-quality. Many small independent jewellers and hobbyists like to work with Czech glass beads because they have various styles and colours and are durable, premium-quality materials. 

Preciosa stands upon centuries of glassmaking tradition and innovation in producing responsibly crafted Bohemian crystal and glass beads.

Where can I buy Czech glass beads?

At Beads N Crystals, we stock an exceptional selection of Czech beads, perfect for creating earrings, bracelets, necklaces, bags, and so much more. Browse our online store and discover the range of high-quality beads, tools and materials to bring your beading ideas to life. 
Looking for something in particular or need more information about a type of bead? No worries! Our friendly team is here to help. Get in touch with us and we’ll help you with all your bead-related questions.

Posted on

How To Make Stone Beads

Have you ever found a stone during a bush walk or a pebble on the beach and just become obsessed with its natural beauty? We certainly have. There’s something enigmatic about how nature creates these forms that can’t be replicated. 

If you’ve always admired these forms or have a little collection of beautiful pebbles that are waiting to be used for something, learning how to make stone beads is a great option. It’s a cheap and simple way to transform these beautiful objects into something even more useful and aesthetically pleasing. 

Making stone beads only requires a few tools, a little bit of patience and a steady grip. If you want to master this DIY hack, read on!

How to make stone beads

Making stone beads requires a drill, so it isn’t a good DIY project for little kids or your first time using a power tool. With some safety goggles and a steady approach, you’ll be rewarded with your very own one-of-a-kind stone beads that can be used for earrings, bracelets, necklaces and any other piece you can imagine! 

Stones can crack if you try to brute force them, so make sure to press lightly and take breaks to get the possible result. 

What you’ll need: 

  • Drill or Dremel tool 
  • Small diamond tip drill bit 
  • Clamp, vise grip or block of putty 
  • A pen or pencil
  • Safety goggles
  • Spray bottle of water

Instructions: 

1. Start by assembling your stones, making sure they are clean. Select your diamond drill bits, bearing in mind that the width of the drill bit will define the size of the finished hole in your beads.

2. On each pebble, mark your hole’s entry and exit points. If you want this to be more even, you can fit a rubber band around the width and length of the stone so that the two bands intersect at a middle point. Mark this cross on each side of the stone with your pen or pencil. 

3. Place the stone in the vise or clamp, or if you don’t have one of these, wedge the stone very securely in a clump of putty. 

4. Spray the marked drill spot with water to stop friction and the drill spot from becoming too hot. You can also place the stone and putty in a plastic container with water covering the pebble.

5. With safety goggles on, hold the drill tip vertically over the marked hole and turn it onto its lowest setting. Gently allow the drill bit to start penetrating the stone. Turn the drill off and check you are happy with the positioning of the hole. Then, continue to drill through the centre of the stone. 

6. When you’re about halfway, release the stone, turn it over, and secure it in place again. Continue drilling until you connect with the first hole. 

7. Sit back and give yourself a pat on the back — you just learned how to make stone beads!

Bring your beaded creations to life with Beads N Crystals

Now that you’ve mastered making stone beads, you may be itching to turn your beads into a fully formed creation. At Beads N Crystals, you’ll find all the materials, tools and high-quality gemstone beads you need to let your creativity run wild. Shop the collection today, or get in touch with us for more tips and tricks on creating beautiful beading at home.

Posted on

How To Clean Gemstone Beads

Gemstone beads are some of the most beautiful and high-impact pieces you can use in bead-making. They add gorgeous natural colour and texture to any combination and, when looked after, provide a high-quality finished product that can be enjoyed for years to come. 

How to clean gemstone beads

Cleaning gemstone beads isn’t hard, and it’s the best way to keep them shining. There are, however, a few rules you’ll need to follow to get the best gleaming results and not risk damage. Let’s break them down.

Our tips for cleaning gemstone beads

  • Store your beads properly

They say the best defence is a good offence, so start your journey cleaning gemstone beads by maintaining their condition in the first place. Gemstones rarely respond well to direct sunlight, so store your beads in a clean, dry and cool place out of direct sunlight. This will stop them from prematurely fading, and keeping them in separate areas will prevent the beads from dulling or scratching from friction with other beads.

  • Know your types of gemstones

Not all gems are created equal — each type has very specific preferences for temperature, appropriate cleaning materials, hardness and more. For some gems like amber and amethyst, the safest cleaning method is with a soft brush and polishing cloth, as they’re very susceptible to chemicals and extreme temperatures. Likewise, emeralds should be kept away from hot water or steam cleaning. Tourmaline is also sensitive to heat but is relatively hardy when it comes to chemical cleaners. You should avoid soaking opals altogether, as prolonged exposure to water damages them.

When choosing your gemstone beads, make sure you buy them from a trusted source and always double-check best practices for cleaning gemstone beads of a certain type specifically.

  • Stay away from strong chemicals

They may seem as hard and solid as a stone, but gems can actually be quite fragile and can be easily tarnished by cleaning gemstone beads with strong chemicals. Any jewellery cleaners that contain ammonia are a no-go, especially for gemstones like pearl and amber, as they quickly erode at the surface. 

To be safe, avoid any strongly formulated cleaners and opt for mechanical (i.e. scrubbing) solutions over chemical ones. 

  • Use more elbow grease than product

Your safest bet for cleaning gemstone beads is to use a lukewarm solution with a few drops of dish detergent and let time and elbow grease do most of the work. If your gems can be soaked in water, leave them to soak for 30 minutes to loosen up any dirt or grime. Simply skip this step for gemstones that can’t rest in a solution. Follow with a very soft-bristled toothbrush with a little soapy water to gently scrub and buff away at the gemstone. Rinse under cool (but not freezing water) and dry completely with a polish cloth to reveal its lustre.

  • Wear your gemstones with care

Taking care of your gemstone jewellery pieces will go a long way to prolonging their life. Avoid swimming with them, spraying them with perfume and treating them delicately, and you’ll be rewarded with years of shine and enjoyment.

Ready to create your next gemstone masterpiece? At Beads N Crystals, we have the best range of beads for all your creative pursuits. Shop our high-quality beads and get inspired today!

Posted on

Beading Techniques (Beginner Friendly)

While there are only a handful of basic bead stitches, there are many ways to combine them to create different textures and looks. If you’re searching for some new techniques to try out with your next project, check out the following list of beading techniques.

Basic beading techniques

Basic beading techniques utilise basic stitches. It’s one of the most popular ways to create jewellery and belts using beads. Spiral stitches are among the most basic and require skills such as threading needles, joining threads, and finishing threads. Below are some easy beading techniques that you can experiment with:

  • Square stitch

    The square stitch (Comanche stitch) is a beading technique that makes a beautiful, textured pattern. As you might have guessed from the name, it produces a square shape with diagonal lines running through it. These stitches look great in just about any colourway and can be used as an accent on other projects. It’s also one of the most popular beading techniques, so if you want to get started with this style without being overwhelmed by tons of patterns and tutorials, this might be your best bet!

    The square stitch is easy to master if you’re familiar with basic beading techniques. Once you learn how to make it, there are several ways to incorporate it into your designs.

  • Flat spiral

    The flat spiral (also called a string of pearls) is a basic hand-beading technique used to make jewellery and other items. Because it’s easy and versatile, it’s also a great stitch for beginners who want to create something from beads. 

    For the flat spiral to work, you’ll need to choose a bead size that will fit into your selected stitch. If you’re new at this, try using 6/0 or 8/0 beads. Beads are available in all sizes and shapes these days — you’ll find them wherever you buy craft supplies or online. If you’re feeling adventurous, try working with coloured glass, Czech beads or polymer clay beads.

  • Peyote stitch

    Peyote stitch is one of the types of seed bead stitches. It’s also known as Gourd Stitch and can be done using either square or round beads. It’s easy to master, but like any other hand-beading technique, you can do it in many different ways! If you’re interested in learning more about this technique, free tutorials online will teach you everything you need to know. 

  • Herringbone stitch

    A herringbone stitch (also called Ndebele or ladder) is a sewing stitch that creates a decorative line on the fabric. It can be used in beadwork, but it’s also just a fun thing to do! Start by stitching up from the bottom of your beadwork. Make sure you leave about an inch of space between where you will start and stop. Then bring your needle back down through the same hole you started, creating a loop with your thread going in one direction (you can do this with one or two needles). Make sure to go right above where you entered the hole, so there isn’t any slack when it comes time for pulling tight. If there is any slackness, tighten up until everything looks neat again.

  • Right-angle weave and variations

    Right-angle weave is a variation of a square stitch. In a right-angle weave, you take one row of stitches in each direction before switching directions. For example, if you were doing left and right rows (as with square stitch), the first row would be all left stitches, then all right stitches, and so on!

  • Netting

    Netting (also called hex netting) is a hand-beading technique in which you weave a thread through a series of beads. It’s commonly called hex netting because the beadwork looks like a hexagon. Netting can be done with any bead, but it tends to be more popular with larger beads as they’re easier to fit onto the thread.

    If you’re trying your hand at the netting technique, it will be helpful to have an up-close view of what you’re doing — otherwise, try looking at your project from above or below it. Ensure all the beads are flat and spaced out evenly before beginning this process, or else your project may not turn out as you had hoped! You’ll need enough space so there’s room between each bead for one strand of wire or thread (the number varies depending on how many strands per row). Thread one end through all three loops and bring it back up through itself; then repeat as many times as necessary until there’s no more room for additional strands.

  • Ladder stitch

    Ladder stitch, or tubular ladder, is a basic beading technique that’s easy to learn but can be used in many different ways. You can use it to make necklaces, earrings, and even two-piece bracelet sets. While the pattern looks complicated at first glance, it doesn’t take long to master the process once you break down the steps into manageable chunks.

  • Bead embroidery on fabric or leather

    Bead embroidery is a form of beadwork that uses a needle and thread to create designs on fabric. It’s great for beginners because you don’t need special materials or equipment; it only takes about 20 minutes to learn how to perfect this beading technique.

  • Twisted herringbone

    The twisted herringbone stitch (or right-angle weave on the diagonal) is a variation on the basic herringbone stitch. It is a bit more challenging to master, but it creates a more innovative pattern and gives your beadwork some texture. To make this stitch, you’re going to weave over two beads, under one bead, and then over two more beads. This will create an “X” shape in your piece of work.

Get your supplies today to start practising different types of seed bead stitches

All in all, there are many different ways to work with beads and create beautiful art pieces. If you’re a beginner, choosing the best method for you can be overwhelming. However, we hope this article has helped by giving an overview of the different methods used for various types of seed bead stitches

Start your new hobby by buying your beads and other jewellery-making supplies from Beads N Crystals today. We have everything you need, from beads to tools and so much more! Browse our online store to find what you’ll need to complete your project today.