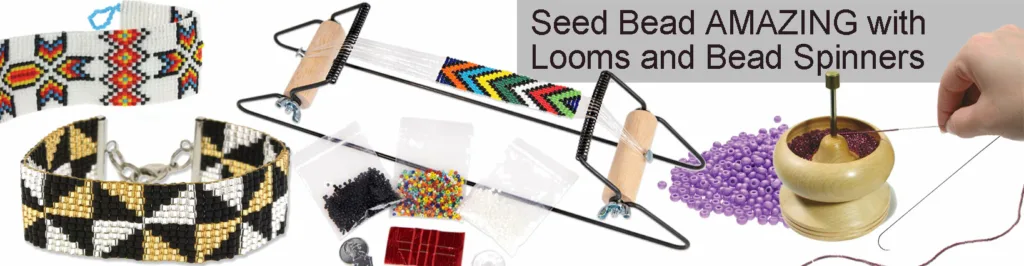
Unleash your creativity with a beam loom
Beading with the conventional method of using a needle and thread is often tedious, especially if you have an intricate pattern you wish to reproduce. Bead looms make the beading so much easier, allowing room for creating a broader spectrum of patterns — from pretty florals and bold geometric lines to nautical and bohemian designs, the list is endless.
Love bracelets? Once you know how to use a bead loom, you can craft on-trend bracelets that can be stacked or layered with delicate and statement creations. For fashion lovers, you can even breathe new life into an old t-shirt by embellishing it with a new and exciting pattern. When it comes to crafting with a bead loom, the sky’s the limit!
How to use a bead loom
When learning how to use a bead weaving loom, the first step is to collect the supplies you will be using. You will need a stitch chart, beads, needles, thread, scissors, a ruler and a bead loom. Many seasoned crafters use seed beads to create detailed work — they are smaller than regular beads, making them easier to cover smaller areas.
- Step 2 — setting up the loom
Setting up and wrapping your loom is an important aspect of learning how to use a bead loom. Once you’ve chosen the width of your design, you can settle on the number of wrap threads your craft project will require. For instance, if you’re creating a bracelet, having seven to eight wrap threads is a good starting point. Knot the threads at the ends to create loops. Using a crochet hook, hook the loops into the wooden barrels over the loom, and pull the threads taut to create the desired tension. Thread your needle, and you’re ready to start the fun process of putting the beads onto the threads.
The first step is a little tricky if you’ve never placed beads on a thread. But with a little patience, you can easily master this step. The trick is to start slowly and place the beads on correctly. You can use waft and weft techniques to string the beads into place. Waft is when the needle or pattern moves horizontally, and weft is the term used to describe the vertical movement of the beads. Once the beads are in place, use the needle to secure the thread at the end of the row. To continue the pattern, lift the previous row of beads and thread the next row under them. When you reach the end of the project, secure the thread and cut off any excess. Your bead loom project is now complete!
Craft eye-catching patterns with the best bead loom kits from Beads N Crystals
Bead looms are a great way to create personalised jewellery and accessories. Unlike other bead weaving techniques, loom work creates a neat and tidy fabric that you can use for a variety of purposes. Best of all, it’s not as difficult as it looks!
Ready to get started? Beads N Crystals is the go-to destination for all your crafting needs, offering high-quality and affordable beading supplies. Whether you love using a beam loom as a hobby or you’re a professional crafter, our expansive collection has everything you need to bring your vision to life. Browse our handy collection of adhesives, beautiful beads and nifty bead looming kits today!